6 Ways to Organize When Shelves Won’t Adjust
This site contains affiliate links, view the disclosure for more information.
Fixed shelves create storage challenges that require alternative solutions. When you organize when shelves won’t adjust, you work with the existing height and depth instead of reconfiguring the shelf positions. This article covers six practical methods that maximize fixed-shelf storage without permanent modifications.
These techniques use stackable tools, dividers, and spatial planning to create custom zones within rigid shelf layouts. Each method addresses common problems like wasted vertical space, unstable stacks, and difficulty accessing items stored in deep or tall compartments.
Measure Shelf Dimensions Before Selecting Organizers
Start by recording the height, width, and depth of each fixed shelf. Measure the vertical clearance between shelves at the front, middle, and back, as some shelving units sag or slope slightly. Write down these measurements before purchasing bins, risers, or dividers.
Identify what you plan to store on each shelf. Group items by height and frequency of use. Place frequently accessed items at eye level. Reserve top shelves for lightweight, rarely needed objects. Store heavier items on lower shelves to prevent tipping.
Check for obstructions like brackets, support beams, or uneven surfaces. These features reduce usable space and may limit the size of storage containers you can use.
Use Shelf Risers to Create Vertical Layers
Shelf risers add a second level within a single fixed shelf. They work best when vertical clearance exceeds the height of your stored items by at least four inches. Place risers toward the back of the shelf to maintain visibility of items stored underneath.
Choose risers with non-slip feet or rubberized bases to prevent shifting. Metal wire risers offer airflow for pantry items or linens. Solid plastic or wood risers provide a stable base for heavier objects like small appliances or books.
Select Riser Height Based on Item Size
Match riser height to the tallest item stored beneath it. Add one inch of clearance for easy removal. A four-inch riser accommodates most canned goods. An eight-inch riser works for cereal boxes or folded sweaters.
Avoid stacking risers on top of each other. This creates instability and makes reaching items difficult. Use a single taller riser instead.
Also Read: 14 Kitchen Organization Mistakes That Make Clutter Worse
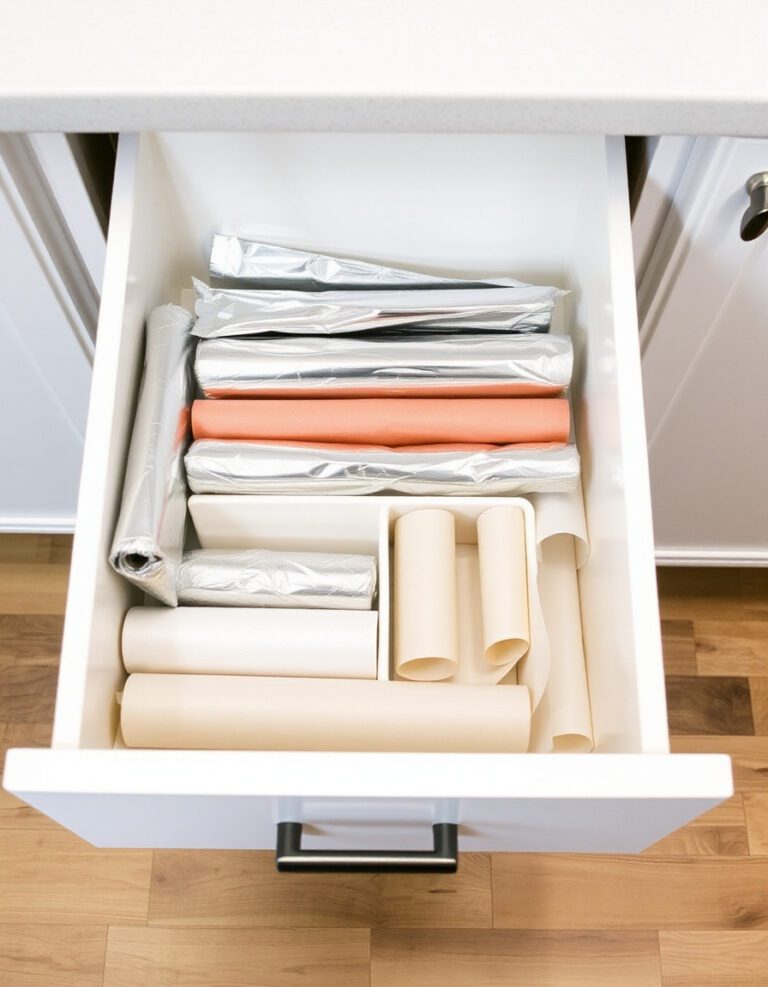
Install Stackable Bins or Drawers
Stackable bins let you organize when shelves won’t adjust by creating modular compartments. Choose bins with interlocking lids or grooved bases that prevent sliding. Clear bins improve visibility. Opaque bins conceal clutter but require labels.
Measure bin dimensions against shelf depth. Leave two inches of clearance at the front for easy grip. Stackable drawer units work well for small items like craft supplies, hardware, or toiletries.
Label Each Bin or Drawer
Apply labels to the front edge where they remain visible when bins are stacked. Use waterproof labels in humid environments like basements or bathrooms. Include general categories rather than exhaustive inventories to allow flexibility as contents change.
Test the weight capacity of stacked bins before loading them fully. Most plastic bins support 10 to 20 pounds per unit when stacked three high. Exceeding weight limits can cause bins to crack or collapse.
Add Tension Rods or Dividers for Vertical Partitions
Tension rods installed vertically between shelves create dividers that prevent items from tipping. Place rods every six to twelve inches to separate cutting boards, baking sheets, or serving platters. Adjust tension carefully to avoid damaging shelf surfaces.
Wire or acrylic shelf dividers attach to the shelf surface with clips or adhesive. These work well for organizing clothing, purses, or books. Choose dividers tall enough to contain your items but short enough to clear the shelf above.
Secure Dividers to Prevent Shifting
Adhesive-backed dividers require clean, dry surfaces for proper bonding. Wipe shelves with rubbing alcohol before applying. Allow adhesive to cure for 24 hours before loading weight against dividers.
Clip-on dividers grip the shelf edge and require a lip or raised front. Test stability by applying gentle sideways pressure. Reposition dividers that wobble or slide.
Also Read: How to Organize Kitchen Drawers for Utensils
Incorporate Hanging Organizers Beneath Shelves
Under-shelf baskets hook over the shelf surface and hang beneath it. They utilize space that otherwise remains empty. Use these baskets for lightweight items like kitchen wraps, cleaning cloths, or small tools.
Choose baskets with coated wire or plastic construction to prevent rust in humid areas. Measure the depth of the hanging portion to ensure it does not block access to the shelf below. Most under-shelf baskets extend four to six inches downward.
Check Weight Limits for Hanging Storage
Under-shelf baskets typically support two to five pounds. Overloading causes the basket to bend or detach, potentially damaging items below. Distribute weight evenly across the basket floor.
Avoid hanging storage beneath shelves used for heavy or fragile items. The added weight and vibration from removing the basket may destabilize objects stored above.
Use Turning Trays for Deep Shelf Access
Turning trays rotate to bring rear items forward without removing front-row objects. They work best on shelves deeper than 12 inches. Place one turning trays per shelf, centered from left to right for balanced rotation.
Choose a turntable diameter two inches smaller than shelf depth to allow clearance for rotation. Non-skid surfaces prevent items from sliding during use. Tiered turning trays add vertical storage within the rotating platform.
Read More: How to Organize Kitchen Countertops for Small Appliances
Group Similar Items on Each Turning Trays
Dedicate each turntable to a single category: spices, condiments, cleaning supplies, or cosmetics. This reduces the need to spin through unrelated items. Arrange taller objects toward the center and shorter items near the edge for visibility.
Test rotation before fully loading the turning trays. Some turntables stick or wobble when weight is unevenly distributed. Adjust item placement to balance the load.
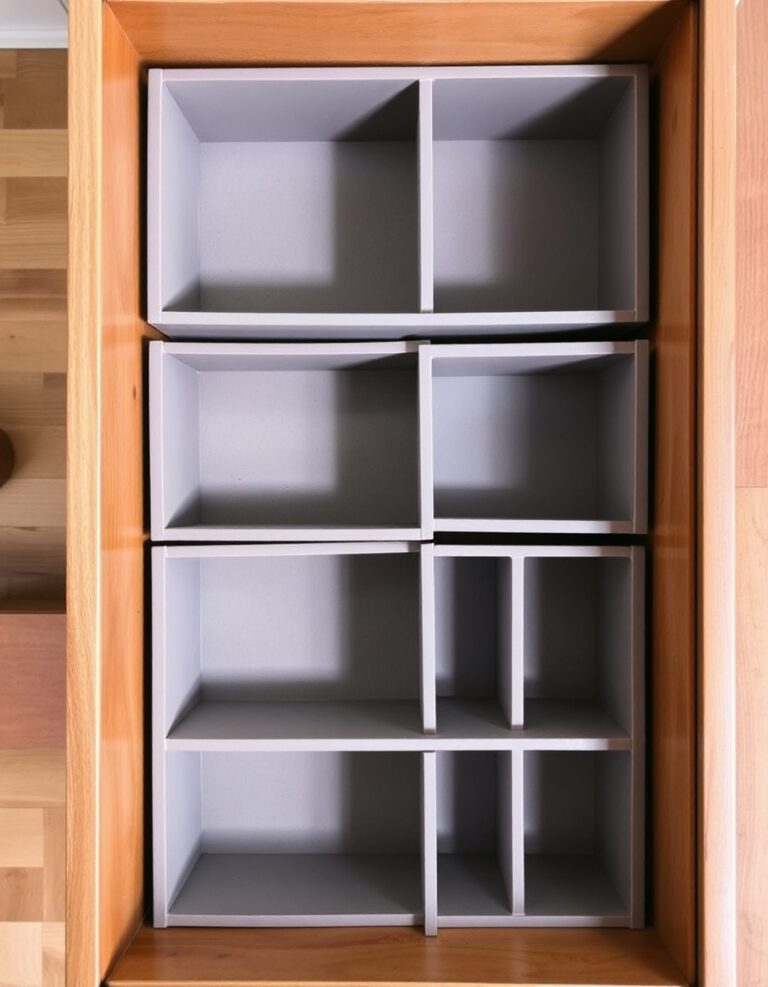
Apply Adjustable Organizers Within Fixed Spaces
Drawer organizers, expandable dividers, and modular trays adapt to different item sizes without requiring shelf adjustment. Expandable dividers telescope from 12 to 24 inches to fit various shelf widths. Modular tray systems snap together in custom configurations.
Place adjustable organizers in zones based on item type. Use shallow trays for office supplies or batteries. Deep compartments work for bulkier items like chargers or tools.
Reconfigure Organizers as Storage Needs Change
Adjustable systems allow you to reorganize when shelves won’t adjust by simply moving dividers or adding trays. Update configurations seasonally or when acquiring new items. Keep unused organizer pieces in a designated storage bin for future use.
Clean organizers every three to six months to prevent dust buildup in corners and grooves. Remove all items, wipe surfaces with a damp cloth, and dry thoroughly before reloading.
For more helpful tips, check out our organization section.