19 Ways to Organize Kitchen Under the Sink for Easy Access
This site contains affiliate links, view the disclosure for more information.
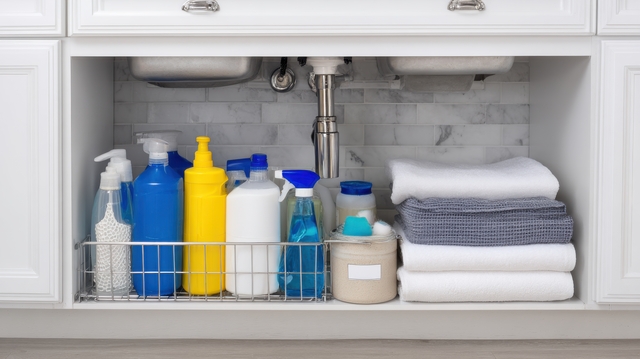
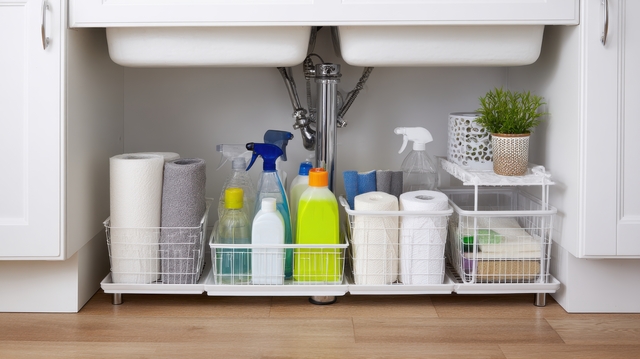
The space under your kitchen sink often becomes a cluttered mess of cleaning supplies, trash bags, and forgotten items. Learning how to organize kitchen under the sink transforms this area into a functional storage zone. Everything stays visible and accessible when properly arranged.
Different kitchens require different solutions. Cabinet size, plumbing layout, and the items you store all affect which organization methods work best. Some homes have garbage disposals that limit space, while others have wide-open areas perfect for bins and shelves.
This guide covers 19 practical ways to organize kitchen under the sink using common storage tools. You’ll learn preparation steps, specific organization methods for different needs, and how to maintain access while maximizing storage capacity.
Clear Everything Out First
Remove all items from under the sink before organizing. Place everything on the counter or floor where you can see it.
Wipe down the cabinet interior with a damp cloth. Check for leaks around pipes while the space is empty.
Group similar items together as you remove them. This shows you what categories need storage solutions. Throw away expired cleaning products and empty bottles immediately.
Measure Your Cabinet Space
Measure the width, depth, and height of your cabinet interior. Note where pipes enter the cabinet and how much space they occupy.
Measure the area on both sides of the plumbing. These measurements determine which organizers fit properly.
Write down measurements before shopping for storage solutions. Bring these numbers to the store or check them against online product dimensions.
Install a Tension Rod for Spray Bottles
Mount a tension rod across the cabinet width, above the plumbing. Hang spray bottles by their triggers on the rod. This keeps them upright and accessible.
Position the rod high enough that bottles don’t block lower storage. Test the tension to ensure it holds the weight of full bottles.
This method works best for cabinets at least 18 inches wide.
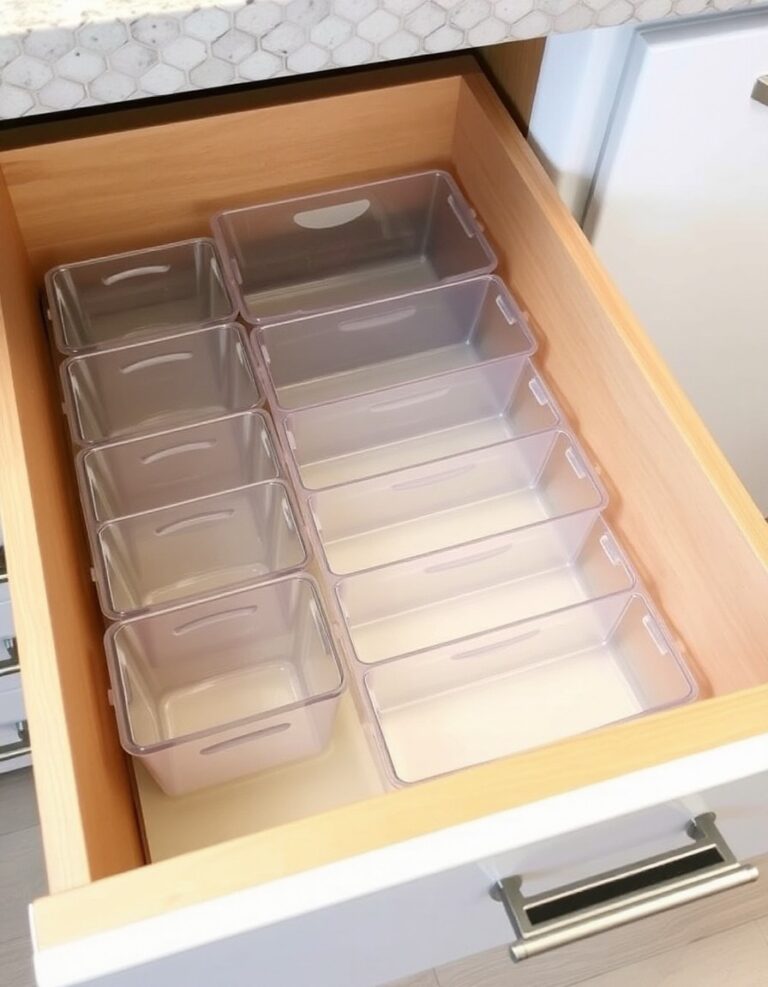
Use Stackable Bins With Handles
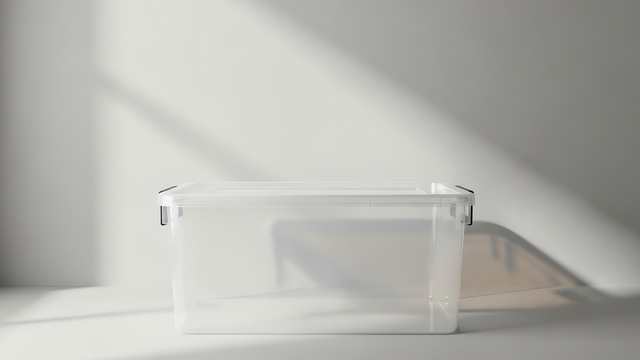
Choose mesh or clear bins so contents stay visible. Stack bins vertically, placing lighter items on top. Keep frequently used items in the top bin.
Handles allow you to pull bins out easily. This prevents digging through stacked items.
Leave space between bin edges and pipes. Bins should slide in and out without catching on plumbing.
Add a Sliding Organizer Drawer
Install a sliding drawer unit that fits around your pipes. These units typically come with two tiers. Place heavy bottles on the bottom tier.
Pull the drawer fully forward to access items in the back. Push it closed when finished.
Measure carefully before purchase. U-shaped drawers accommodate standard sink plumbing configurations.
Mount Adhesive Hooks Inside Doors
Stick adhesive hooks to the inside of cabinet doors. Hang cleaning gloves, small brushes, or dish towels from these hooks. Use the vertical door space for flat items.
Choose hooks rated for the weight of your items. Remove hooks slowly if you need to reposition them to avoid paint damage.
Avoid hanging heavy spray bottles that can pull hooks loose over time.
Install an Expandable Shelf
Place an expandable shelf unit on the cabinet floor. Adjust the width to fit your cabinet dimensions. Position the shelf to rise over pipes when possible.
Store shorter items underneath the shelf. Place taller items on top or beside it.
This creates two storage levels in the same footprint.
Also Read: How to Organize Kitchen Cabinets in Small Spaces
Organize Kitchen Under the Sink With Turning Trays
Use round turntables for bottles and supplies. Place one or two turning trays on the cabinet floor. Group similar items together on each turntable.
Spin the turntable to access items in back. This eliminates reaching into dark corners.
Choose turning trays with raised edges to prevent items from sliding off during rotation.
Create Zones by Category
Designate specific areas for different item types. Keep all dish soap and sponges in one zone. Place trash bags in another zone.
Store cleaning sprays together in a third zone. This system makes items predictable and easy to find.
Use small bins or dividers to maintain zone boundaries.
Hang a Basket on the Door
Attach a wire basket or pocket organizer to the cabinet door. Store sponges, scrub brushes, or gloves in basket compartments. Keep items you use daily in this highly accessible spot.
Ensure the basket doesn’t interfere with door closure. Test the door swing before loading the basket fully.
Use Drawer Dividers for Small Items
Place a cutlery tray or drawer divider on a cabinet shelf. Sort small items into individual compartments. Separate sponges from scrub pads and cleaning cloths.
This prevents small items from scattering across the cabinet. Each item gets a specific location.
Dividers work especially well on pull-out shelves.
Store Trash Bags in a Tissue Box
Place folded trash bags inside an empty rectangular tissue box. Pull bags out one at a time through the box opening. This keeps the roll contained and prevents bags from unfolding.
Mount the box to the cabinet side with adhesive strips. Alternatively, place it in a bin with other supplies.
Install Adhesive Storage Pouches
Stick clear adhesive pouches to cabinet walls. Store flat items like sponges or cleaning cloths inside. These pouches utilize vertical wall space.
Position pouches away from pipes and moving parts. Ensure they don’t interfere with closing organizers or bins.
Check that adhesive is rated for the surface material of your cabinets.
Add a Pull-Out Trash Can
Install a sliding trash can system attached to the cabinet door or frame. The can pulls forward when you open the door. This frees up floor space inside the cabinet.
Choose a can size that fits your cabinet depth. Leave room for pipes and other storage.
Some systems include dual bins for trash and recycling.
Use Magazine Holders for Flat Items
Stand plastic magazine holders on the cabinet floor. Store aluminum foil boxes, plastic wrap, and wax paper vertically inside holders. This keeps flat boxes organized and prevents crushing.
Label each holder if you store multiple types of items. Magazine holders also work for storing extra sponges or cleaning cloths.
Read More: 7 Fixes for Kitchen Drawers That Overfill Too Easily
Group Backup Supplies Separately
Keep backup bottles and refills in one designated container. Store only current-use items in easily accessible spots. Place backups toward the cabinet rear or on higher shelves.
This prevents cluttering prime storage space with items you won’t need soon. Rotate backups to the front when current supplies run low.
Attach a Towel Bar Inside the Door
Mount a small towel bar on the inside of the cabinet door. Hang spray bottles with trigger handles from the bar. This method works similarly to a tension rod but uses door space.
Ensure bottles hang clear of the cabinet frame when closing the door. Adjust bar height to prevent interference.
Use Risers for Vertical Stacking
Place shelf risers on the cabinet floor to create multiple levels. Stack items of varying heights efficiently. Put short items under risers and tall items beside or on top.
Choose risers with feet tall enough to accommodate the items below. Metal or plastic risers both work well in cabinet environments.
Maintain Clear Access to Shut-Off Valves
Identify water shut-off valves under your sink. Keep this area clear of storage bins and bottles. You need immediate access during plumbing emergencies.
Mark valve locations with a small label if they’re not immediately visible. Test that you can reach and turn valves easily.
Never block shut-off valves with permanent storage solutions.

For more helpful tips, check out our organization section.