21 Ways to Organize Kitchen Small Appliances in Cabinets
This site contains affiliate links, view the disclosure for more information.
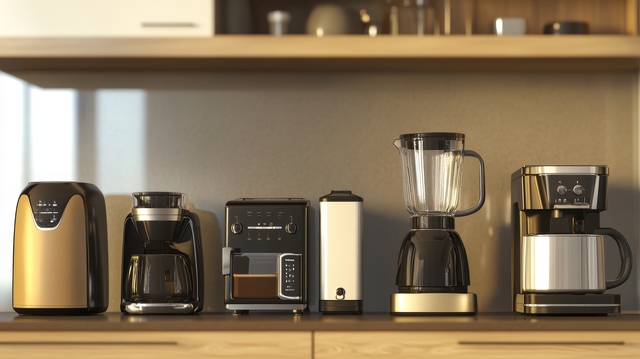
Kitchen cabinets fill up fast when you own a toaster, blender, air fryer, and stand mixer. Most people struggle to organize kitchen small appliances because cabinet space is limited and appliances vary in size and shape. The result is stacked items, wasted vertical space, and appliances you can’t reach without moving three other things first.
Different cabinet layouts require different solutions. A deep corner cabinet needs a different approach than a narrow upper cabinet. Your usage patterns matter too—daily appliances belong in different spots than seasonal ones.
This guide covers 21 methods to organize kitchen small appliances inside cabinets. You’ll find strategies for maximizing vertical space, creating appliance zones, using shelf systems, and storing accessories. The methods are organized from simple rearrangement to cabinet modifications that require installation.
Sort Appliances by Frequency of Use
Group appliances into three categories before placing them in cabinets. Daily appliances include coffee makers, toasters, and blenders used multiple times per week. Occasional appliances are stand mixers, food processors, or waffle makers used monthly. Seasonal appliances include ice cream makers or specialty holiday items.
Place daily appliances in the most accessible cabinets at counter height. Store them in lower cabinets if counter space allows, or in upper cabinets between shoulder and waist height. Put occasional appliances in less convenient spots like upper shelves or corner cabinets. Store seasonal appliances in the hardest-to-reach spaces, such as cabinets above the refrigerator or in the basement.
This sorting process typically reduces cabinet clutter by 30-40% once you realize which appliances can move to storage outside the kitchen.
Measure Cabinet Dimensions Before Organizing
Record the width, depth, and height of each cabinet you plan to use. Measure the interior space, not the door opening. Note any pipes, hinges, or obstacles that reduce usable space.
Measure your appliances next:
- Height with lid or attachments
- Width at the widest point
- Depth including protruding buttons or handles
- Cord length
Compare measurements to identify which appliances fit in which cabinets. This prevents buying organizers that don’t fit or planning layouts that look good on paper but fail in practice.
Use Shelf Risers for Vertical Space
Shelf risers double your storage capacity in cabinets with tall vertical gaps. Place a riser on the existing shelf to create a second level. Store shorter appliances like hand mixers or mini food processors underneath. Put taller items like blender bases on top.
Bamboo or metal risers hold more weight than plastic versions. Choose risers that are at least 6 inches deep for stability. The height should be 4-6 inches to fit most small appliances underneath.
Position risers toward the back of the cabinet for items you use less often. Keep the front space clear for frequently used appliances.
Install Pull-Out Cabinet Shelves
Pull-out shelves bring items in deep cabinets within reach. You don’t need to remove front items to access appliances stored in the back. These shelves work especially well in lower cabinets where bending and reaching is difficult.
Most pull-out shelves require drilling into cabinet walls. Measure your cabinet interior width and depth before purchasing. Leave 1-2 inches of clearance on each side for the sliding mechanism.
Install shelves at heights that match your appliances. A 12-inch shelf works for blenders and food processors. A 6-inch shelf fits hand mixers and immersion blenders.
Create an Appliance Garage on the Counter
An appliance garage is a cabinet section at counter level with a roll-up or bi-fold door. It keeps daily appliances accessible but hidden. This isn’t technically inside a cabinet, but uses cabinet space differently.
Store your coffee maker, toaster, and kettle in the garage. Leave them plugged in for immediate use. The door conceals visual clutter when you’re not using them.
Converting existing cabinets to appliance garages requires removing shelves and installing new door hardware. Measure the counter depth carefully—most appliance garages are 18-24 inches deep.
Stack Appliances with Drawer Dividers
Use expandable drawer dividers vertically in cabinets to create separated zones. Place dividers perpendicular to the cabinet door to form compartments. This prevents appliances from sliding into each other.
Store blender jars in one compartment, food processor bowls in another. Keep bases separate from lids and attachments. The dividers typically adjust from 12-24 inches and lock into place with spring tension.
This method works best in cabinets at least 20 inches wide. Narrower cabinets don’t provide enough compartment space.
Use Turning Trays in Corner Cabinets
Corner cabinets waste significant space because items in the back are unreachable. A turning tray rotates to bring all items to the front opening. Choose a two-tier turning trays to maximize vertical space.
Place lighter appliances like hand mixers and immersion blenders on the top tier. Put heavier items like slow cookers on the bottom. Avoid storing very tall appliances that might catch on the cabinet top when rotating.
Measure your corner cabinet’s interior diameter before purchasing. Most Turning trays range from 12-20 inches in diameter. Leave at least 2 inches of clearance between the edge and cabinet walls.
Store Appliances in Original Boxes
Original packaging protects appliances from dust and impact. Boxes stack more uniformly than appliances of different shapes. This method works well for seasonal or rarely used items.
Write the appliance name on the box exterior with permanent marker. Include the date you last used it. This helps identify items you might no longer need.
Cardboard boxes degrade over time in humid environments. Check boxes annually for moisture damage. Replace deteriorated boxes with plastic bins if needed.
Install Wire Shelf Organizers
Wire shelving creates adjustable storage zones inside cabinets. These systems typically include vertical posts and adjustable shelf clips. You can set shelf heights to match specific appliances.
Mount the vertical posts to cabinet walls with screws. Position shelves at 8-10 inch intervals for most small appliances. Use deeper shelves (12-14 inches) for stand mixers or bread machines.
Wire shelving allows air circulation around appliances. This reduces moisture buildup and musty odors in closed cabinets.
Group Appliances with Related Accessories
Store each appliance with its attachments in the same location. Keep food processor blades in the processor bowl. Wrap mixer attachments in a small cloth bag and place it inside the mixer bowl.
Use small plastic bins or baskets for loose cords and manuals. Label each container with the appliance name. Place the bin directly next to or underneath the corresponding appliance.
This system eliminates the need to search multiple cabinets when you want to use an appliance. Setup time decreases significantly.
Use Tension Rods for Vertical Dividers
Install tension rods vertically in cabinets to create dividers. Place rods 6-8 inches apart to form slots. Slide cutting boards, baking sheets, or flat appliance lids into the slots.
This method works for items like waffle maker plates, panini press plates, or air fryer trays. The rods hold items upright and prevent toppling.
Choose tension rods rated for the weight you’re storing. Spring-loaded rods work in cabinets 12-36 inches wide. Check rod security weekly—they can loosen over time.
Label Cabinet Shelves by Appliance Type
Use removable labels to mark where each appliance belongs. Write “blender,” “toaster,” or “hand mixer” on adhesive labels. Place labels on the shelf or cabinet wall.
This system works well in shared households where multiple people organize kitchen small appliances. Everyone knows where items belong. It reduces time spent searching and prevents misplacement.
Update labels when you acquire new appliances or discard old ones. Remove labels cleanly to avoid adhesive residue.
Store Heavy Appliances in Lower Cabinets
Stand mixers, bread machines, and large food processors weigh 10-20 pounds. Storing them in upper cabinets creates safety risks. They’re difficult to lift down without dropping.
Always store appliances over 10 pounds below waist height. Use lower cabinets or floor-level pantry space. Install pull-out shelves in these locations to avoid bending and reaching into deep cabinets.
Place heavy appliances toward the front of shelves. This prevents strain when lifting them out.
Use Magazine Holders for Flat Appliances
Metal magazine holders store flat appliances vertically when space is limited. This method works for electric griddles under 3 pounds, thin panini presses, and flat sandwich makers. The appliance must be relatively uniform in thickness—typically 1-3 inches.
Place metal magazine holders on cabinet shelves with the open side facing out. Slide one appliance into each holder. Plastic holders often lack the structural support needed for appliances—choose metal versions rated for at least 5 pounds.
Measure your appliance width before purchasing holders. Most flat griddles are 10-14 inches wide and require holders at least 4-5 inches deep. Standard magazine holders are 9-12 inches tall, which accommodates most flat cooking appliances.
This storage method works best for appliances without protruding buttons or handles. Control panels that stick out more than 1 inch can catch on the holder edges. You can typically fit 2-3 holders across a standard 24-inch cabinet shelf, depending on appliance width.
Store cords separately using hooks or cord wraps. Cords left attached create bulk that prevents appliances from sliding cleanly into holders.
Install Hooks for Cord Management
Adhesive hooks on cabinet doors or interior walls keep cords organized. Wrap each cord loosely and hang it on a dedicated hook. This prevents tangled cords and makes appliances ready to use.
Place hooks at different heights to accommodate various cord lengths. Use hooks rated for at least 2 pounds—cords weigh more than they appear. Avoid wrapping cords too tightly, which can damage internal wiring over time.
Check adhesive strength monthly. Humidity can weaken adhesive in cabinets near dishwashers or sinks.
Create Zones for Baking vs. Cooking Appliances
Separate appliances by function. Store baking appliances (stand mixers, hand mixers, food processors) in cabinets near your baking supplies. Put cooking appliances (slow cookers, pressure cookers, rice cookers) near pots and pans.
This zoning reduces movement when preparing meals. You gather all needed tools from one cabinet area. It also helps when multiple people work in the kitchen simultaneously.
Mark zones with different colored bins or labels if you prefer visual organization.
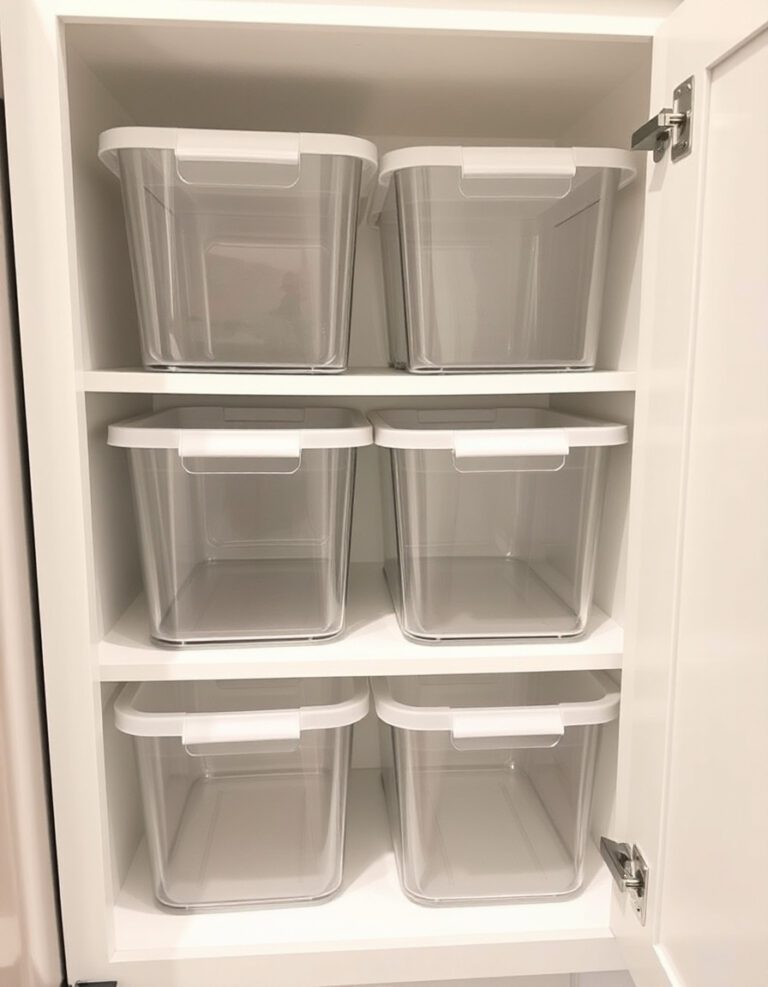
Use Stackable Storage Bins
Clear plastic bins with lids protect appliances from dust and grease. Bins stack securely, maximizing vertical cabinet space. Choose bins sized to your specific appliances.
Place lighter appliances in upper bins. Store heavier items in bottom bins to prevent stack collapse. Write appliance names on bin exteriors with dry-erase markers for easy updating.
Leave 2-3 inches of space between bin tops and the shelf above. This clearance allows easy bin removal.
Remove Cabinet Doors for Open Shelving
Taking doors off cabinets creates open storage for daily appliances. You eliminate the step of opening doors before use. This works well for appliances you use multiple times daily.
Cabinet interiors are less finished than exteriors. You may see raw wood or paint overspray. Consider painting or lining the interior before removing doors.
This method increases visual clutter. Use it selectively in one or two cabinets rather than throughout the kitchen.
Store Small Attachments in Drawer Organizers
Beaters, dough hooks, and processor blades fit in drawer organizers designed for utensils. Use divided trays with compartments sized for different attachment types.
Place all mixer attachments in one drawer section. Put food processor blades and discs in another. Keep immersion blender attachments separate.
This method only works if you have available drawer space. It frees up cabinet room for appliance bases.
Use Command Strips for Lightweight Items
Command strips hold lightweight appliances or accessories on cabinet doors or walls. They work for hand-held mixers under 3 pounds, immersion blenders, or electric can openers.
Clean the mounting surface with rubbing alcohol before applying strips. Press firmly for 30 seconds. Wait 24 hours before hanging items to allow adhesive to cure fully.
Check strip security monthly. Heat and humidity can reduce holding power over time.
Install Cabinet Shelf Pins at Custom Heights
Most cabinets have pre-drilled holes for adjustable shelf pins. You can move shelves to custom heights that match your appliances exactly. Remove a shelf, relocate the pins, and reinstall the shelf at the new height.
Measure your tallest appliance in a cabinet. Set the shelf 2-3 inches higher than that measurement. This provides clearance for easy removal and prevents scratching cabinet tops.
Keep at least one movable shelf per cabinet. Fixed shelving limits your ability to reorganize as appliances change.

For more helpful tips, check out our organization section.