How to Organize Kitchen Pantry for Baking Ingredients
This site contains affiliate links, view the disclosure for more information.
Baking ingredients create unique storage challenges in any kitchen pantry. Flour bags tear, sugar clumps, yeast expires unnoticed, and chocolate chips end up scattered across three different shelves. When you organize kitchen pantry space specifically for baking supplies, you reduce waste and speed up meal prep.
Different kitchens require different storage approaches. Some bakers work with small apartment pantries. Others manage walk-in spaces with room for bulk storage. The methods that work depend on your available space, baking frequency, and ingredient variety.
This guide covers zone-based pantry organization for baking ingredients. You’ll learn how to group items by type, choose appropriate containers, label for inventory tracking, and arrange shelves by usage frequency. These steps apply to standard pantries, cabinet spaces, and dedicated baking stations.
Assess Your Current Baking Inventory
What You Need
- All baking ingredients from every storage location
- Trash bag for expired items
- Notepad or phone for inventory list
- Measuring tape
Steps to Inventory
- Remove every baking item from your pantry, cabinets, and drawers
- Check expiration dates on all perishable ingredients
- Discard anything past its date or showing signs of spoilage
- Group remaining items into categories: flours, sugars, leaveners, flavorings, add-ins, and oils
- Count duplicates within each category
- Measure your available pantry shelf depth and width
- Note which items you use weekly versus monthly
Flour and baking powder lose effectiveness after their expiration dates. Using old leaveners produces flat baked goods.
Stop when you have a complete list and measurements.
Create Baking Zones in Your Pantry
Primary Baking Zones
- Dry staples zone: flours, sugars, oats, cornmeal
- Leavening and spices zone: baking powder, baking soda, yeast, vanilla, cinnamon, cocoa powder
- Add-ins zone: chocolate chips, nuts, dried fruit, sprinkles
- Oils and liquids zone: vegetable oil, olive oil, honey, corn syrup, molasses
Zone Placement Strategy
Place your most-used zone at eye level or on the most accessible shelf. This typically means dry staples get prime real estate. Position heavy items like flour bags and sugar containers on lower shelves. Keep leavening agents and spices on upper shelves away from heat and moisture.
Organize kitchen pantry zones so each category stays contained. This prevents cross-contamination between ingredients and makes inventory checks faster.
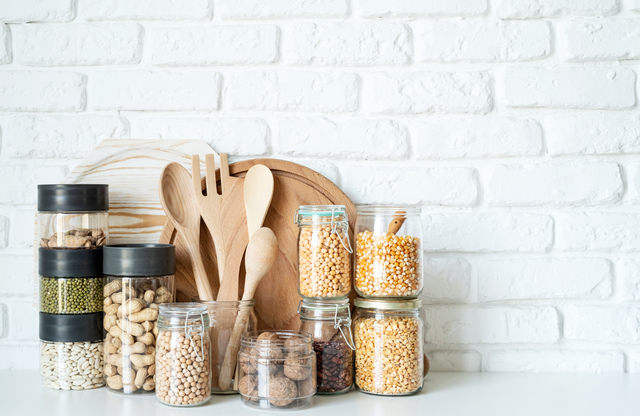
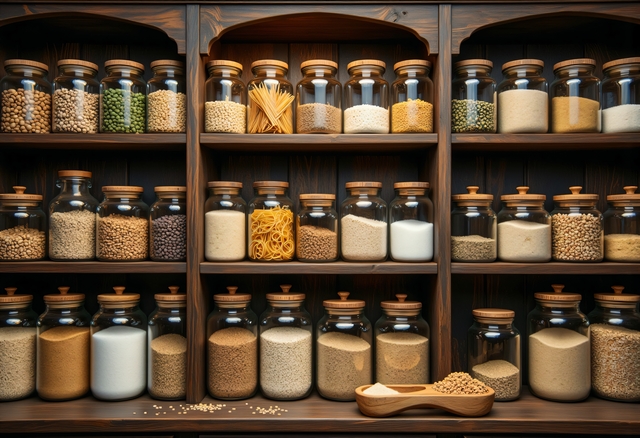
Select Storage Containers for Each Ingredient Type
Flour and Sugar Containers
Use airtight containers with wide openings for easy scooping. Containers should hold 5–10 pounds for all-purpose flour. Choose clear containers so you can see quantity at a glance. Square or rectangular shapes maximize shelf space better than round containers.
Leavening Agent Storage
Store baking powder and baking soda in their original containers inside small bins. This protects the packaging and groups items together. Keep yeast packets in a small airtight container or glass jar. Active dry yeast stays fresh longer when sealed tightly.
Small Ingredient Solutions
Transfer chocolate chips, nuts, and dried fruit into medium jars or containers with secure lids. Use smaller jars for vanilla extract, food coloring, and other liquid flavorings. Stack uniform containers to save vertical space.
Silicone or plastic bags work for ingredients you buy in bulk but use slowly.
Label Everything with Purchase or Expiration Dates
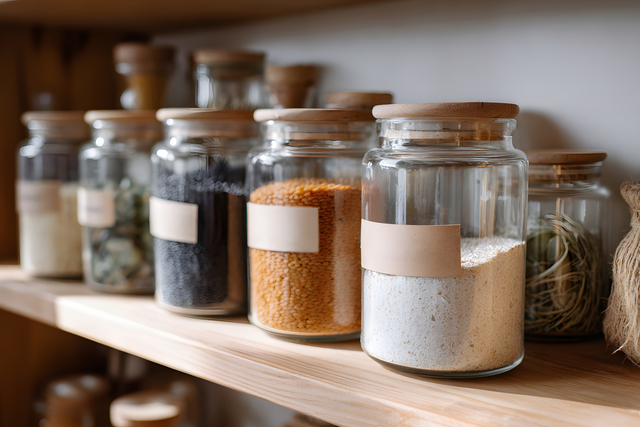
Labeling Tools
- Label maker or printable labels
- Permanent marker
- Masking tape for temporary labels
What to Include on Labels
- Ingredient name in large text
- Purchase date or expiration date
- Net weight or quantity (optional but helpful for reordering)
Write dates on the front of containers at eye level. This removes the need to pull containers forward to check freshness. When you organize kitchen pantry shelves with clear dating, you use ingredients in proper rotation.
Replace labels when you refill containers. Don’t layer new labels over old ones.
Arrange Shelves by Usage Frequency
Top Shelf
Store backup supplies and infrequently used specialty items. This includes extra bags of flour, holiday sprinkles, and decorating supplies. Items here might be accessed monthly or seasonally.
Eye-Level Shelves
Place your everyday baking staples here. All-purpose flour, granulated sugar, brown sugar, baking powder, vanilla extract, and chocolate chips belong at this height. You should access these items without bending or stretching.
Lower Shelves
Position heavy containers and bulk items on bottom shelves. Large bags of bread flour, containers of honey, and backup sugar supplies work well here. Lower placement prevents strain when lifting heavy items.
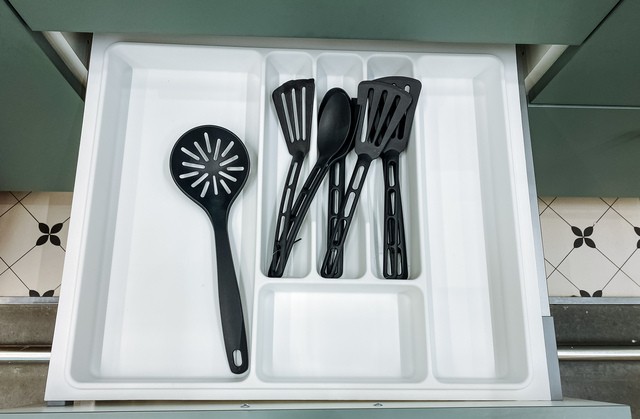
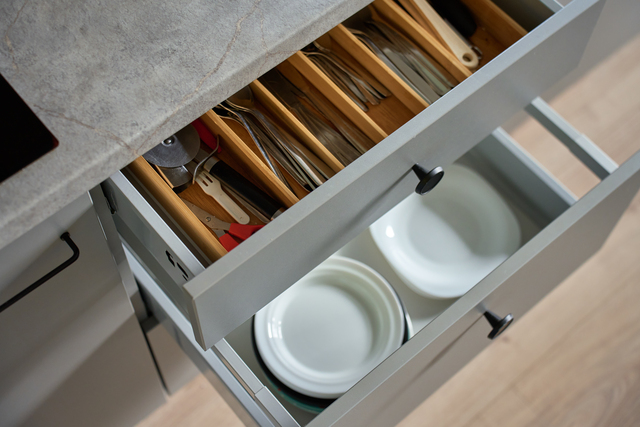
Keep measuring cups and spoons in this zone if you have drawer space nearby.
Read More: How to Organize Kitchen Utensils in a Messy Drawer
Group Ingredients by Recipe Type
Bread Baking Section
- Bread flour
- Whole wheat flour
- Active dry yeast
- Instant yeast
- Vital wheat gluten
Cookie and Cake Section
- All-purpose flour
- Cake flour (if used regularly)
- Granulated sugar
- Brown sugar (light and dark)
- Chocolate chips
- Vanilla extract
Specialty Baking Section
- Almond flour
- Coconut flour
- Alternative sweeteners
- Specialty extracts
- Decorating supplies
This grouping method reduces search time when you start a specific recipe. You can see what’s in stock for that baking category without scanning the entire pantry.
Use Shelf Risers and Bins for Small Items
Shelf Riser Benefits
Risers create two levels on a single shelf. This works well for short containers like spice jars and extract bottles. You can see items in the back row without moving front containers.
Place risers in your spices and flavorings zone. Group items by type on each tier.
Bin Organization
Use small bins or baskets to corral packets and small items. One bin might hold yeast packets, another could contain food coloring gels, and a third might store piping tips or cookie cutters.
Label bins on the front and spine for visibility from multiple angles.
Store Flour and Grains Pest-Free
Container Requirements
Use hard plastic or glass containers with gasket-sealed lids for all flour types. Bay leaves placed in flour containers can deter weevils and moths. One or two dried bay leaves per container is sufficient.
Flour beetles and pantry moths can infest paper flour bags within weeks of purchase. Transfer flour to sealed containers immediately after buying.
Grain Storage Guidelines
Whole grain flours contain oils that turn rancid faster than white flour. Store whole wheat flour, almond flour, and coconut flour in the refrigerator if you won’t use them within one month. Keep working portions in pantry containers for convenience.
White rice and cornmeal tolerate room temperature storage in airtight containers for several months.
Also Read:
- 19 Ways to Organize Kitchen Under the Sink for Easy Access
- How to Organize Kitchen Wooden Spoons and Spatulas
- 15 Ways to Organize Kitchen Mixing Bowls
Maintain Brown Sugar Texture
Brown sugar hardens when exposed to air. Transfer brown sugar to an airtight container immediately after opening the bag. Place a terra cotta brown sugar disk in the container to maintain moisture. Wet the disk every few months or when sugar starts hardening.
Alternative moisture sources include a piece of bread or a marshmallow, though these need replacement more frequently. The container seal matters more than the moisture source.
Store light and dark brown sugar separately to avoid mixing in recipes that specify one type.
Separate Baking Chocolate by Type
Storage Method
Unwrap chocolate bars and break them into smaller pieces if desired. Store pieces in labeled containers or resealable bags. Keep milk chocolate, dark chocolate, and white chocolate in separate containers.
Store chocolate in a cool, dry area of the pantry away from strong odors. Chocolate absorbs nearby smells.
Temperature Considerations
Chocolate melts around 86–90°F. Don’t store chocolate near the stove, dishwasher, or in direct sunlight. If your pantry gets warm, move chocolate to a cooler cabinet or the refrigerator during summer months.
Condensation forms on chocolate when moving it from cold to warm environments. Let refrigerated chocolate reach room temperature before opening the container.
Handle Opened Ingredient Bags
Immediate Transfer Items
Transfer these ingredients to containers right after opening:
- All flours
- Granulated sugar
- Powdered sugar
- Baking soda
- Cornstarch
- Cocoa powder
Keep in Original Packaging
These items function well in their original containers:
- Baking powder (moisture-sensitive packaging)
- Individual yeast packets
- Corn syrup bottles
- Molasses jars
- Extracts in dark bottles
Place opened bags inside larger bins or containers for secondary protection. This catches spills and keeps packaging from tearing further.
Create a Baking Station Outside the Pantry
If counter or cabinet space allows, dedicate one area to active baking. Keep your most-used measuring tools, mixing bowls, and ingredients in this zone. Organize kitchen pantry space for backup supplies while keeping working quantities near your mixing area.
This two-location system prevents pantry traffic during recipe preparation. You restock the baking station from pantry inventory as needed.
The station might include a small container of flour, sugar, salt, and your favorite extract.
Address Shelf Height Limitations
Standard wire pantry shelves sit 10–12 inches apart. This creates wasted vertical space above short containers. Add stackable shelf organizers to use this space. Alternatively, adjust shelf heights if your shelving system allows customization.
Tall items like corn syrup bottles and molasses jars need adequate clearance. Measure before committing to a shelf configuration.
Leave at least one shelf with 14–16 inches of clearance for standing mixers or large containers.
Prevent Cross-Contamination for Allergens
If household members have food allergies, designate separate storage areas for allergen-containing ingredients. Common baking allergens include tree nuts, peanuts, coconut, and sesame seeds.
Store allergenic ingredients in sealed containers on a separate shelf or in a different cabinet. Use dedicated measuring cups and spoons for these ingredients. Label allergen containers clearly in a different color.
Clean spills immediately to prevent allergenic dust from spreading to other ingredients.

For more helpful tips, check out our organization section.