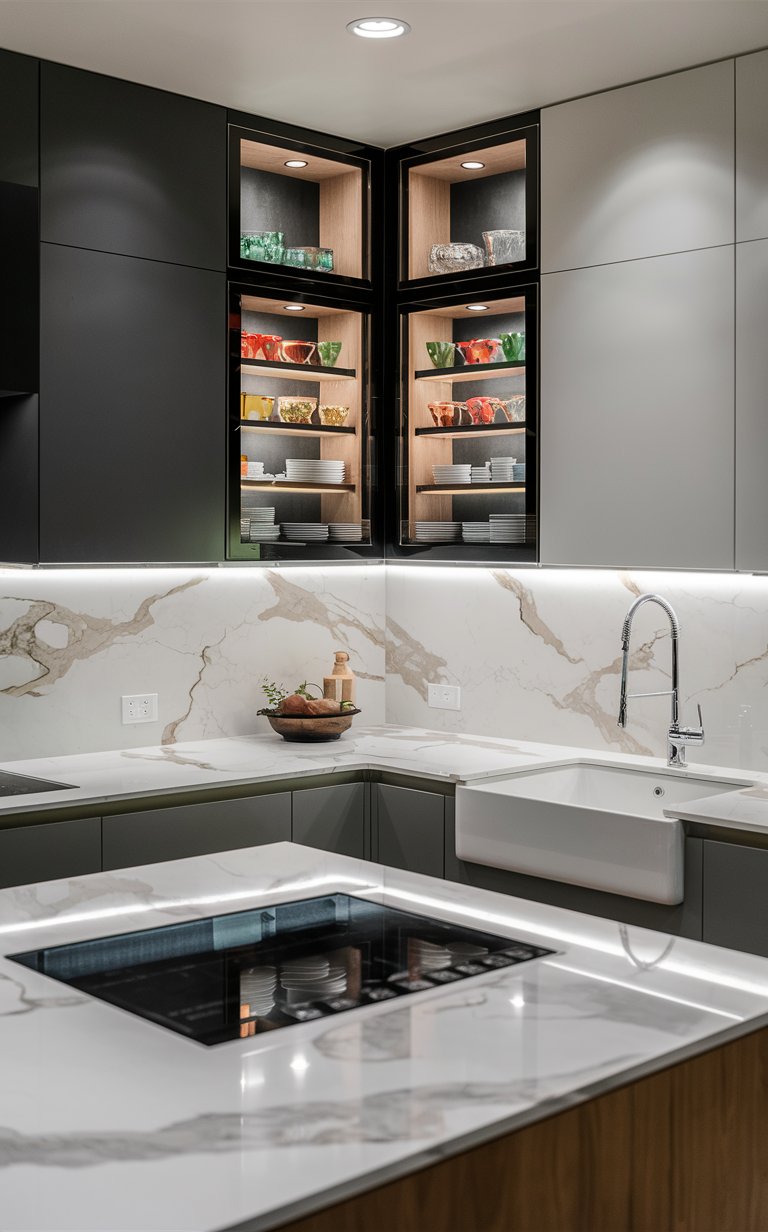
15 Ways to Organize Kitchen Mixing Bowls
This site contains affiliate links, view the disclosure for more information.
Kitchen mixing bowls take up significant cabinet space and often stack poorly. Nested bowls can be difficult to separate without disturbing the entire stack. Lids often get separated from their matching bowls.
Different kitchens have different storage constraints. Some kitchens have deep cabinets that suit vertical stacking. Others have wide, shallow drawers or open shelving. The best method depends on your bowl types, cabinet dimensions, and how frequently you use each size.
This guide covers 15 methods to organize kitchen mixing bowls. It includes cabinet-based solutions, drawer systems, vertical dividers, and hanging options. Each method lists required tools, installation steps, and material compatibility.
Safety and Preparation Before Organizing
Clear the cabinet or drawer completely before installing any organizing system. Remove all bowls, lids, and other items. Wipe down surfaces to remove dust or spills.
Measure your cabinet or drawer interior dimensions before purchasing organizers. Measure height, width, and depth in multiple spots. Older cabinets may not have perfectly square corners.
Check weight limits for shelves and organizers. Glass and ceramic bowls can be heavy when stacked. Most cabinet shelves support 20–30 pounds. Wire organizers typically support less weight than solid shelves.
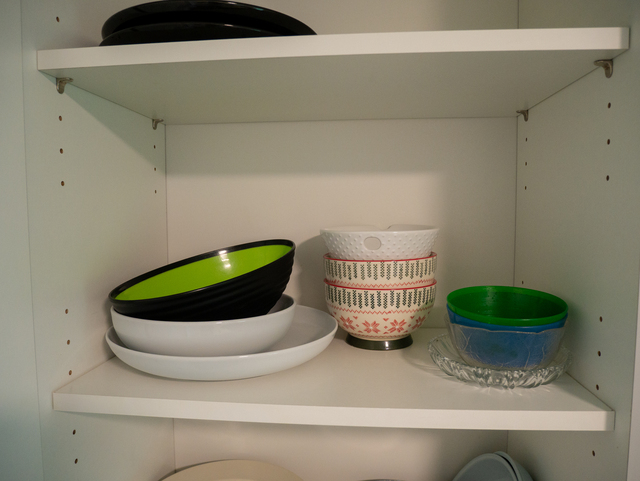
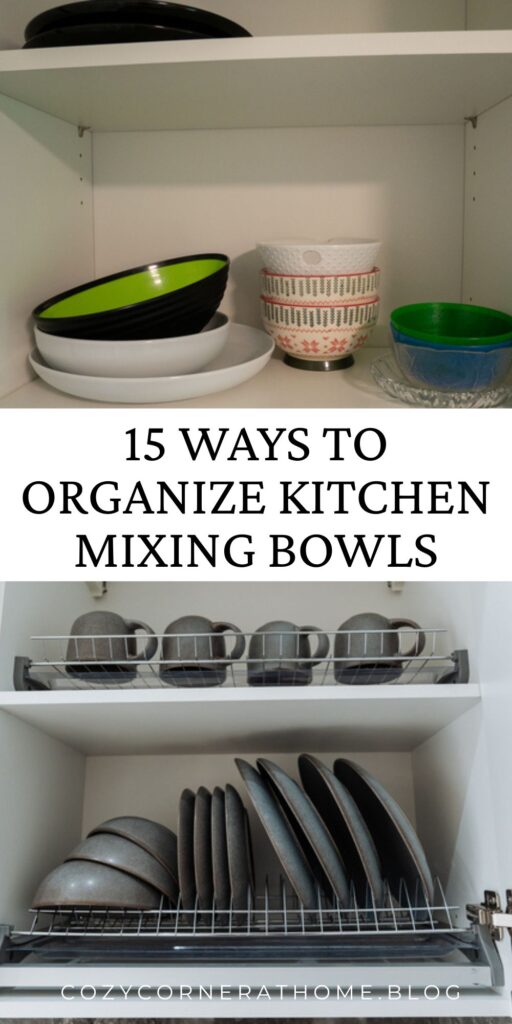
Nest Bowls by Size in Cabinet Stacks
Place the largest bowl on the bottom. Nest each progressively smaller bowl inside. This method works best for bowl sets with graduated sizes.
Turn each bowl so handles or spouts alternate direction. This prevents sticking and makes individual bowls easier to lift out. Leave a small gap between each bowl if possible.
Limit stacks to 4–5 bowls maximum. Taller stacks become unstable and difficult to access. Store the most frequently used size on top.
Read More: 7 Fixes for Kitchen Drawers That Overfill Too Easily
Use Vertical Plate Dividers for Bowls
Install adjustable vertical dividers designed for plates. Space dividers to match your bowl diameters. Most dividers adjust between 1 and 3 inches apart.
Stand bowls upright on their rims between dividers. This method prevents nesting and allows you to remove one bowl without disturbing others. It works best for shallow or medium-depth cabinets.
Secure dividers to prevent sliding when you remove bowls. Some models have rubber feet or adhesive pads. Wire dividers with tension springs fit inside cabinets without installation.
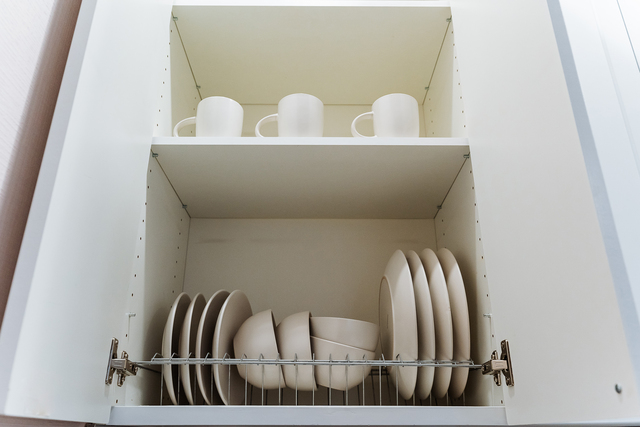
Install Pull-Out Cabinet Organizers
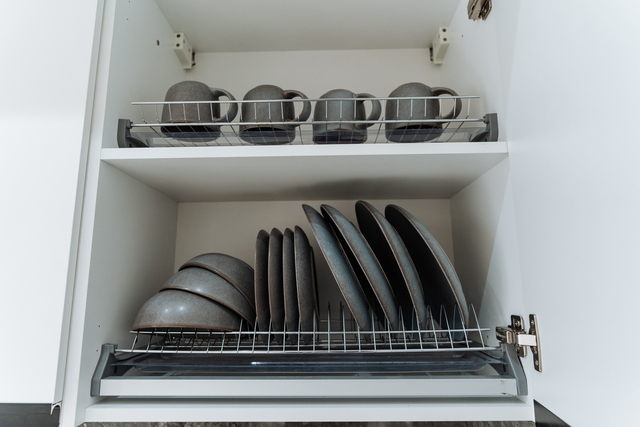
Measure your cabinet opening width and depth. Purchase a pull-out organizer rated for your cabinet dimensions. Most models require 12–24 inches of depth.
Mount the sliding rails to the cabinet sides using the provided screws. Ensure rails are level before fully tightening. Attach the organizer basket or shelf to the rails.
Test the pull-out mechanism with bowls loaded. The organizer should slide smoothly without binding. Adjust rail positioning if needed. This method provides full visibility and access to all bowls.
Store Bowls in Deep Drawers with Pegboard Inserts
Cut pegboard to fit your drawer dimensions. Use 1/4-inch or 1/2-inch pegboard from hardware stores. Sand any rough edges.
Insert pegs at intervals that match your bowl diameters. Place bowls upright between pegs. The pegs prevent bowls from sliding during drawer movement.
Line the drawer bottom with non-slip liner before adding pegboard. This keeps the pegboard stable. Adjustable pegs allow you to reconfigure spacing as your bowl collection changes.
Use Stackable Wire Organizer Shelves
Place a wire shelf riser inside your cabinet. These shelves typically add 6–10 inches of height. Choose a width that fits your cabinet interior.
Stack bowls on both the cabinet floor and the raised shelf. This doubles your vertical storage capacity. It works best for cabinets taller than 12 inches.
Select shelves with rubber feet to prevent scratching cabinet surfaces. Wire construction allows air circulation, which helps prevent moisture buildup. Avoid overloading the top shelf with heavy ceramic bowls.
Organize Kitchen Mixing Bowls with Tension Rod Dividers
Install spring-loaded tension rods vertically inside a cabinet. Space rods to create compartments for different bowl sizes. Most tension rods adjust from 12 to 48 inches.
Place bowls upright between the rods. The rods act as dividers without requiring screws or adhesive. This method allows quick reconfiguration.
Use rubber-tipped rods to prevent damage to cabinet surfaces. Check tension periodically, as rods can loosen over time. This method works best for lightweight bowls.
Also Read: 7 Deep Drawer Organization Ideas to Reduce clutter
Mount Bowls Under Cabinets with Adhesive Hooks
Attach strong adhesive hooks to the underside of upper cabinets. Space hooks to match the rim diameter of your most-used bowls. Use hooks rated for at least 5 pounds each.
Hang bowls by their rims or handles. This method works only for bowls with secure handles or pronounced rims. It frees up cabinet space below.
Clean the mounting surface with rubbing alcohol before applying hooks. Allow adhesive to cure for 24 hours before hanging bowls. This method is not suitable for heavy glass or ceramic bowls.
Store Lids Separately in Vertical File Organizers
Use a plastic or metal file organizer designed for documents. Stand bowl lids vertically in each slot. This prevents lid stacks from toppling.
Label slots by lid diameter if you have many similar sizes. Keep the organizer in the same cabinet as bowls or in a nearby drawer. Match lids to bowls when needed.
Choose organizers with adjustable dividers for different lid thicknesses. This method reduces the time spent searching for matching lids.
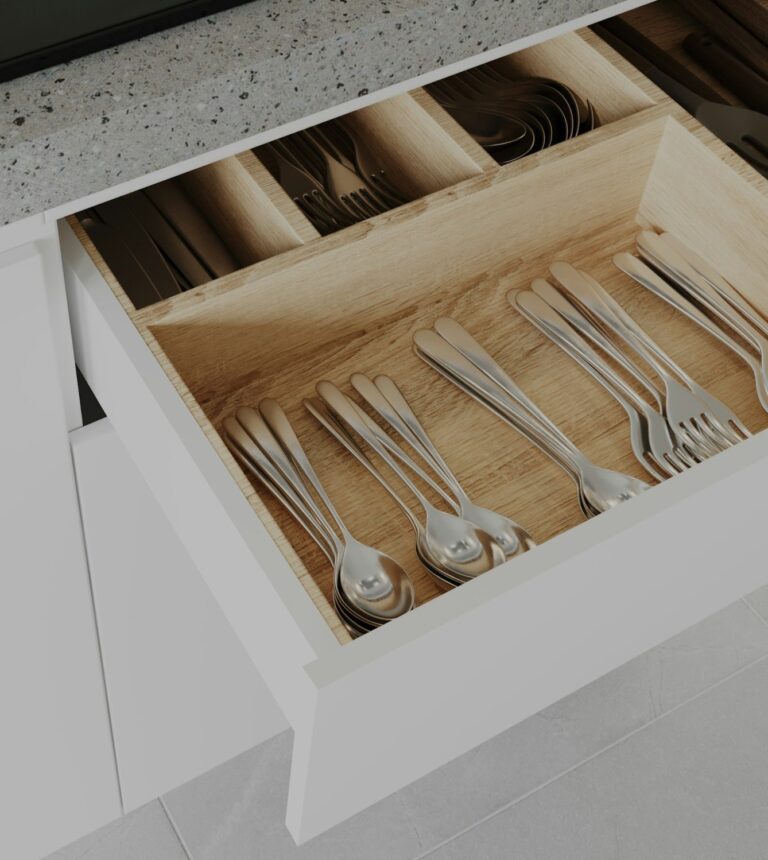
Create Drawer Dividers with Foam Board
Measure your drawer interior dimensions. Cut foam board into strips that match the drawer height. Foam board is available at craft stores.
Create a grid pattern by inserting perpendicular foam strips. The foam should fit snugly to stay in place. Size each compartment to hold one bowl upright.
Foam board is lightweight and easy to reconfigure. It cushions bowls to prevent chipping. Replace foam if it becomes compressed or damaged.
Related Post: 8 Ways to Handle Junk Drawers That Keep Refilling
Use Turntables for Corner Cabinets
Place a turntable on the corner cabinet floor. Choose a diameter that fits your cabinet depth, typically 12–18 inches. Turntables with raised edges prevent bowls from sliding off.
Arrange bowls on the turntable with largest in the center and smallest toward the edge. Rotate the turntable to access bowls in the back. This method maximizes corner cabinet space.
Select turntables with non-slip surfaces or rubber feet. Test rotation with bowls loaded to ensure smooth movement. Avoid stacking bowls too high, as this can make the turntable unstable.
Install Over-the-Door Organizers for Small Bowls
Hang an over-the-door organizer with pockets on a cabinet or pantry door. Choose organizers with deep pockets that can hold bowl depth. Most models hook over standard cabinet doors without tools.
Place one bowl per pocket. This method works best for small prep bowls, ramekins, or individual serving bowls. It keeps frequently used bowls visible and accessible.
Check that the door can close fully with the organizer installed. Some cabinet hinges may not allow for added thickness. Distribute weight evenly across pockets to prevent the organizer from sagging.
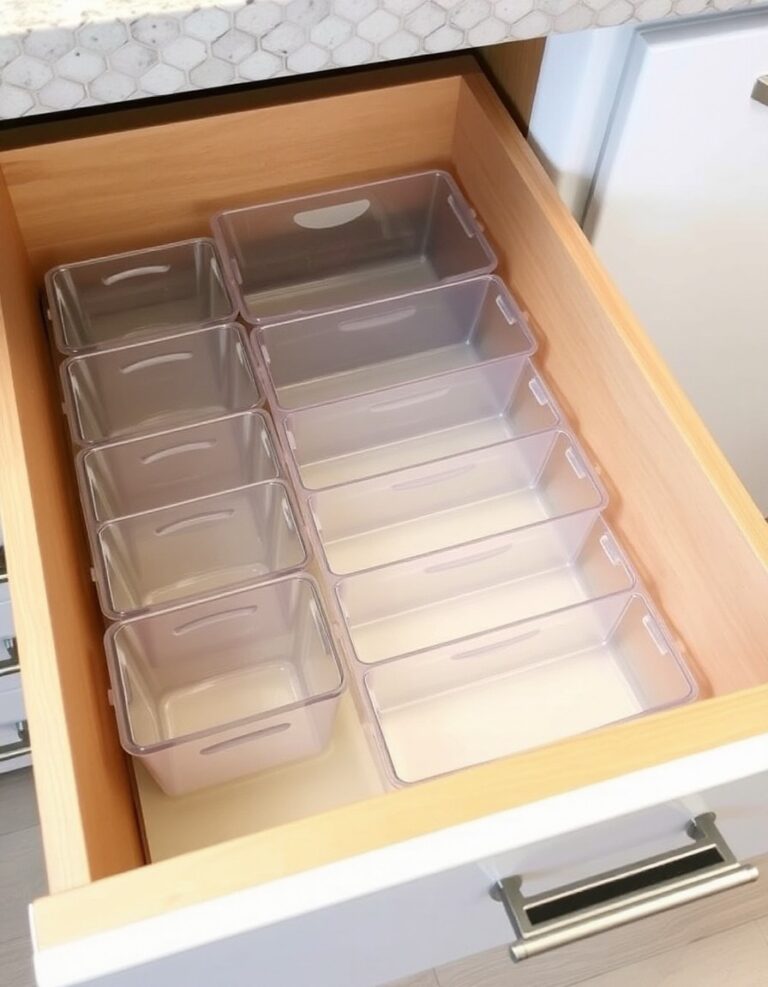
Dedicate a Drawer to Bowls with Custom Foam Inserts
Trace each bowl’s outline on closed-cell foam. Cut out the traced shapes with a craft knife. The foam should be at least 1 inch thick.
Place the foam insert in the drawer. Nest each bowl in its designated cutout. This method protects bowls during drawer movement and prevents shifting.
Use high-density foam for heavy bowls. Label each cutout if you have multiple similar sizes. Replace foam if it becomes worn or compressed.
Stack Bowls with Shelf Liners Between Each Layer
Cut circular shelf liner pieces slightly larger than each bowl diameter. Place a liner between nested bowls. The liner provides friction and cushioning.
This method prevents bowls from sticking together. It also reduces noise when removing bowls from a stack. It works with existing cabinet storage without additional organizers.
Choose non-adhesive shelf liner that can be easily removed and cleaned. Replace liners if they become sticky or collect residue. This method is suitable for all bowl materials.
Use Magnetic Strips for Metal Bowls
Mount adhesive or screw-mounted magnetic strips to the inside of a cabinet door. Space strips vertically about 6 inches apart. Use heavy-duty magnetic strips rated for kitchen use.
Attach metal mixing bowls to the magnetic strips. This method works only for stainless steel or other magnetic metal bowls. It frees up shelf space.
Test magnet strength with your heaviest bowl before full installation. Ensure cabinet doors can support the additional weight. This method is not suitable for glass, ceramic, or plastic bowls.
Drying and Maintenance After Organizing
Dry all bowls completely before placing them in organizers. Moisture trapped in storage can promote mold or odors. Air-dry bowls upside down on a dish rack.
Clean organizers monthly to remove dust and food particles. Wipe wire shelves, dividers, and inserts with a damp cloth. Dry thoroughly before replacing bowls.
Check stability of installed systems every few months. Tighten any loose screws or adjust tension rods as needed. Replace damaged organizers promptly to prevent bowl breakage.
For more helpful tips, check out our organization section.