How to Organize Kitchen Utensils in a Messy Drawer
This site contains affiliate links, view the disclosure for more information.
A cluttered utensil drawer makes cooking slower and more frustrating. When you need a spatula or whisk, you shouldn’t have to dig through a tangled pile of tools. Learning how to organize kitchen utensils transforms a chaotic drawer into a functional workspace.
Different kitchens need different solutions. A small apartment drawer requires a different approach than a large family kitchen with dozens of tools. The number of utensils, drawer depth, and available budget all affect which method works best.
This guide covers preparation steps, divider options, arrangement strategies, and maintenance limits. You’ll learn how to organize kitchen utensils using drawer inserts, DIY dividers, and vertical storage methods.
Clear and Sort Before Organizing
Remove Everything First
Pull every item out of the drawer. Place utensils on a clean counter or table. This lets you see the full drawer space and assess what you own.
Wipe out crumbs and debris from the empty drawer. Use a damp cloth or handheld vacuum. A clean base prevents buildup under your new organization system.
Sort by Function and Frequency
Group similar tools together. Put all spatulas in one pile, whisks in another, measuring spoons separately. This reveals duplicates and broken items.
Separate daily-use tools from occasional ones. Everyday items like wooden spoons and tongs should stay in the main utensil drawer. Specialty tools like melon ballers or pastry brushes can move to a secondary location.
Donate duplicates you don’t need. Discard bent, broken, or rusty utensils. Metal utensils with rust spots can contaminate food.
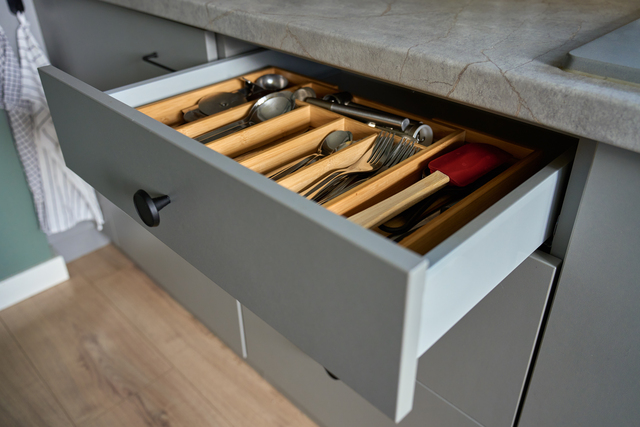
Use Expandable Drawer Dividers for Flexible Storage
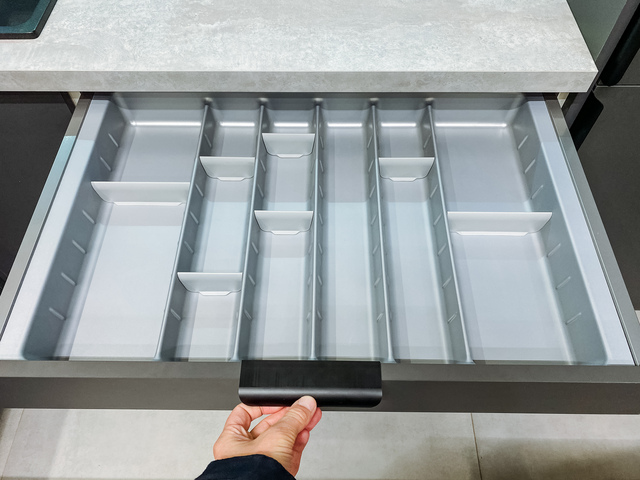
Choose Adjustable Dividers
Expandable plastic or bamboo dividers fit most standard drawer sizes. Measure your drawer width and depth before purchasing. Most dividers adjust between 12 and 18 inches wide.
Spring-loaded dividers lock into place without screws or adhesive. They create 4 to 6 compartments depending on the model. This works well for renters or anyone who wants a removable system.
Arrange Tools by Size and Type
Place the longest utensils in the back compartments. Spatulas, ladles, and large spoons fit better in deeper sections. Shorter items like can openers and peelers go in front compartments.
Keep serving utensils separate from cooking utensils. Serving spoons and tongs often have decorative handles that take more space. Group them in one dedicated section.
Store paired items together. Measuring spoons on a ring stay in one compartment. Matched sets of silicone spatulas can share a section.
Create Custom Dividers with Small Boxes
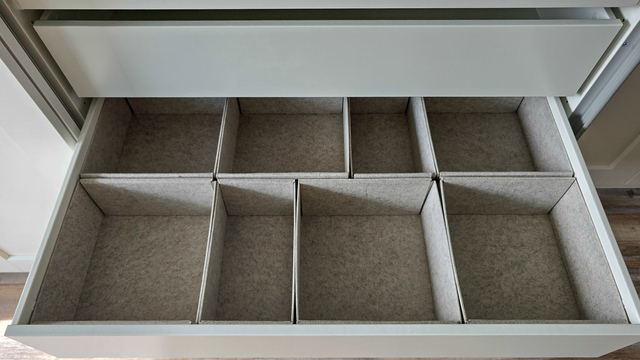
Select Rigid Containers
Cardboard drawer organizer boxes cost less than premade dividers. Choose boxes with straight sides and similar heights. Mismatched heights create unstable stacking.
Small plastic bins work for this method. Look for bins between 2 and 4 inches wide. Rectangular shapes use drawer space more efficiently than round containers.
Fit Boxes to Drawer Dimensions
Measure boxes against your drawer before placing them. Trim cardboard boxes with scissors if needed. Cut away from your body when trimming thick cardboard.
Arrange boxes in a grid pattern. Push them tightly together to prevent shifting. The friction between boxes usually holds them in place during normal drawer use.
Leave a small gap along one side for airflow. Trapped moisture can warp cardboard dividers over time.
Also Read: How to Organize Kitchen Cabinets in Small Spaces
Organize Kitchen Utensils with Honeycomb Dividers
Build Compartments for Each Tool Type
Connect modules to form narrow cells for thin tools. Measuring spoons and chopsticks fit in single-width compartments. Wider utensils like turners need two modules connected.
Place heavy tools in center compartments. The weight helps stabilize the entire grid. Lighter silicone tools can go in edge sections.
Test the grid by opening and closing the drawer several times. Modules can shift if the fit is too loose. Add one more row of modules if needed to create friction against drawer sides.
Separate Utensils with Tension Rods
Install Rods Across Drawer Width
Measure the interior drawer width between side panels. Purchase spring-tension rods slightly longer than this measurement. Rods designed for windows work for this purpose.
Place the first rod about 3 inches from the drawer front. Twist to extend and lock it between drawer sides. Press firmly to ensure the rod won’t slip when the drawer opens.
Install a second rod 3 to 4 inches behind the first. This creates lanes for different utensil categories.
Layer Tools Between Rods
Stand tall utensils upright between rods. Wooden spoons, spatulas, and whisks lean against rods without falling forward. This method uses vertical space instead of laying tools flat.
Place shorter tools in the front section. Measuring cups and small gadgets fit in the space before the first rod. Keep this area for items you grab most often.
This works best in drawers at least 4 inches deep. Shallow drawers don’t provide enough height for upright storage.
Related Post: 15 Ways to Organize Kitchen Mixing Bowls
Handle Deep Drawers with Tiered Trays
Stack Shallow Trays at Different Levels
Deep drawers waste space when utensils lay flat on the bottom. Tiered trays create two or three storage levels. Look for trays with stepped or stadium-style designs.
Place the tallest section at the back of the drawer. Front sections should slope down for visibility. You can see every tool without removing the top layer.
Assign Categories to Each Level
Store serving utensils on the top tier. Large serving spoons and salad tongs need easy access but get used less frequently. The elevated position keeps them visible.
Place everyday cooking tools in the front lower section. Spatulas, whisks, and wooden spoons you use daily should be easiest to reach.
Reserve the deepest back section for backup tools. Extra spatulas or seasonal items can sit below the tiered tray.
Prevent Overcrowding in Limited Spaces

Apply the One-In-One-Out Rule
Add new utensils only when you remove old ones. This maintains a stable drawer capacity. Kitchens accumulate duplicate tools over time without active management.
Reevaluate drawer contents every 6 months. Remove tools you haven’t used in that period. Store seasonal items like turkey basters in a different location until needed.
Relocate Specialty Tools
Move infrequently used tools to a different drawer or cabinet. Items like corn holders, citrus zesters, or egg slicers don’t need prime drawer space. A secondary drawer or upper cabinet works better.
Keep sharp tools like zesters separate from general utensils to prevent cuts when reaching into the drawer. Use a dedicated section with a protective barrier.
Limit your main utensil drawer to 15 to 20 commonly used tools. This prevents the drawer from becoming too heavy or jammed.
Maintain Drawer Organization Over Time
Reset Tools After Each Use
Return utensils to their assigned compartments immediately after washing. Tossing clean tools randomly into the drawer undoes organization within days. Taking three extra seconds per item maintains the system.
Wipe dividers monthly when cleaning the kitchen. Crumbs and liquids accumulate around compartment edges. Sticky residue makes utensils harder to remove.
Adjust Dividers as Needs Change
Move dividers when you add or remove tool types. A compartment that’s too large lets tools shift and tangle. Resize sections to match current inventory.
Replace worn dividers before they fail completely. Cardboard dividers typically last 12 to 18 months. Plastic and bamboo versions last several years with normal use.
Do not overload compartments beyond their design capacity. Forcing too many tools into one section bends dividers and breaks organizing systems. Redistribute items or remove excess tools instead.
For more helpful tips, check out our organization section.