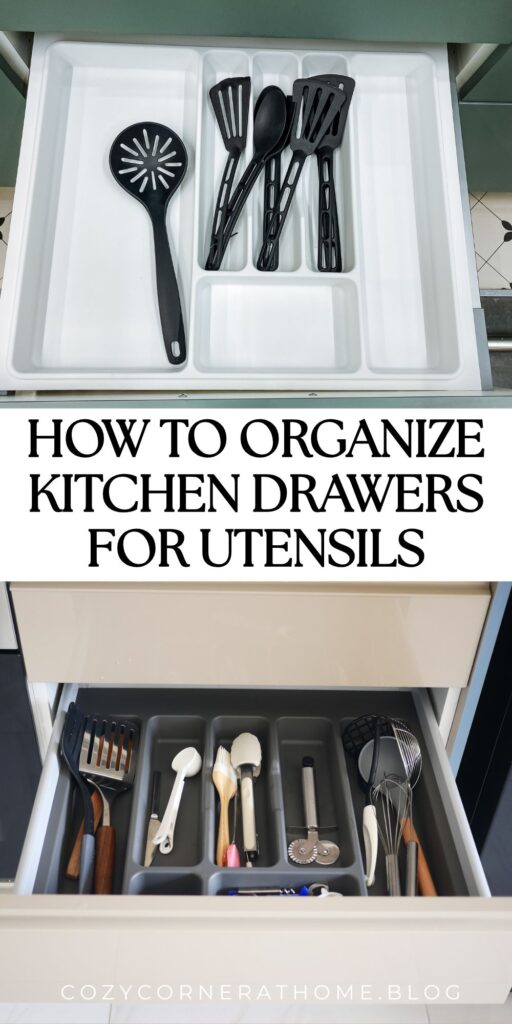
How to Organize Kitchen Drawers for Utensils
This site contains affiliate links, view the disclosure for more information.
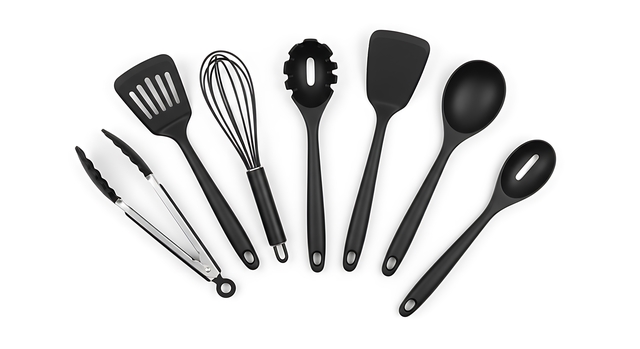
Kitchen utensil drawers often become cluttered, making it difficult to find the right tool when cooking. Learning how to organize kitchen drawers for utensils saves time and reduces frustration during meal preparation. Most households accumulate spatulas, whisks, tongs, and serving spoons without a clear storage system.
Different kitchens require different organizational methods based on drawer size, utensil quantity, and cooking habits. Some cooks prefer divided sections for each tool type, while others group items by function. The right system depends on your specific drawer dimensions and the types of utensils you use most often.
This guide covers drawer preparation, divider selection, categorization methods, and maintenance techniques. You will learn how to sort utensils, choose appropriate organizers, and create a system that stays functional over time. The steps work for standard kitchen drawers and can be adapted to deep drawers or shallow pull-outs.
Empty and Assess the Drawer Space
Remove all utensils from the drawer completely. Place them on a clean counter or table where you can see everything at once. This step reveals the actual drawer dimensions and condition.
Wipe down the drawer interior with a damp cloth. Check for crumbs, sticky residue, or drawer liner damage. Allow the drawer to dry fully before adding any organizers.
Measure the drawer width, depth, and height. Write down these measurements. You will need them when selecting dividers or organizer trays. Interior drawer dimensions often differ from exterior cabinet measurements.
Sort Utensils by Type and Frequency of Use
Group similar utensils together on your counter. Create separate piles for spatulas, spoons, whisks, tongs, ladles, and specialty tools. Discard any broken items or duplicates you no longer need.
Identify which utensils you use daily versus occasionally. Daily-use items should go in the most accessible drawer section. Less common tools can occupy harder-to-reach areas.
Count the items in each category. This helps determine how many divider sections you need. A drawer with 15 spatulas requires different organization than one with three.
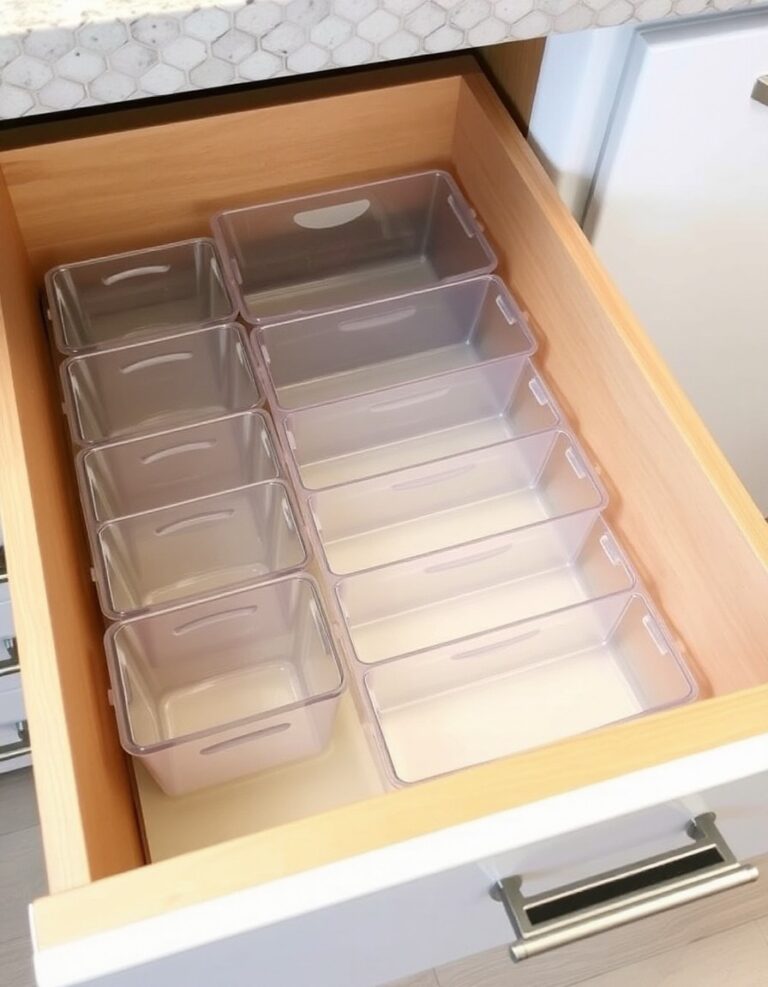
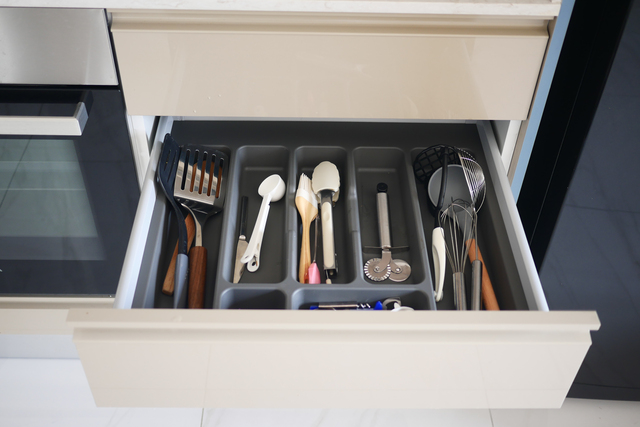
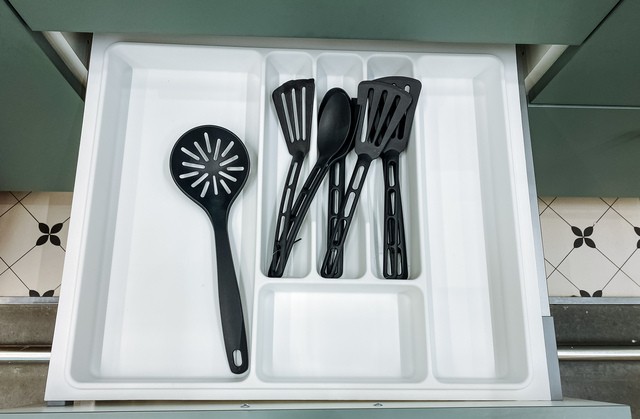
Select Drawer Dividers or Organizer Trays
Adjustable Dividers
Expandable plastic or bamboo dividers fit various drawer widths. These typically feature spring-loaded ends that press against drawer sides. They create 2–6 compartments depending on the model.
Adjustable dividers work well for renters or those who rearrange frequently. They can be removed and repositioned without tools. Check weight capacity before loading heavy utensils.
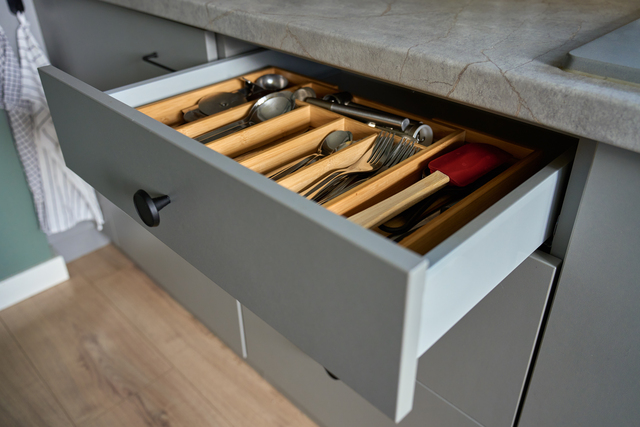
Fixed Organizer Trays
Molded silicone, plastic, or bamboo trays come in standard sizes. Measure your drawer before purchasing to ensure proper fit. Some trays stack vertically for deep drawers.
Fixed trays often include pre-sized slots for specific utensil types. They provide more stability than adjustable dividers. Look for non-slip bases if your drawer slides frequently.
Custom Cut Inserts
Foam board, pegboard, or acrylic sheets can be cut to exact drawer dimensions. This method works for unusually shaped drawers. Use a utility knife or saw for precise cuts.
Custom inserts require more setup time but offer perfect fit. Mark utensil outlines on foam for visual organization. Pegboard allows movable pegs for flexible spacing.
Read More: 19 Ways to Organize Kitchen Under the Sink for Easy Access
Arrange Utensils Using Categorization Methods
By Tool Type
Place all spatulas in one section, whisks in another, and tongs in a third. This method works well for cooks who think in terms of tool names. It simplifies inventory checks.
Keep similar sizes together within each section. Stack flat items like fish spatulas separately from offset spatulas. Group metal tongs apart from silicone-tipped versions if desired.
By Function
Group tools based on cooking tasks rather than appearance. Create sections for stirring tools, flipping tools, serving tools, and baking tools. This system suits cooks who organize by meal preparation steps.
A stirring section might include wooden spoons, silicone spatulas, and whisks. Flipping tools could hold turners and fish spatulas together. Adjust groupings based on your cooking style.
By Material
Separate metal utensils from silicone, wood, and plastic tools. This prevents scratching and helps with care requirements. Metal tools can typically handle high heat, while silicone has temperature limits.
Store wooden spoons away from metal items that might dent them. Keep delicate items like silicone whisks in protected sections. This method extends utensil lifespan.
Read More:
- How to Organize Kitchen Wooden Spoons and Spatulas
- How to Organize Kitchen Cabinets in Small Spaces
- How to Organize Kitchen Utensils in a Messy Drawer
Optimize Drawer Layout for Access
Position your most-used utensils at the front of the drawer or in the dominant-hand side. Right-handed cooks typically reach right first. Place daily spatulas and spoons in these prime spots.
Store tall items like ladles vertically if drawer height allows. Some organizers include raised sections for upright storage. This prevents long handles from blocking other compartments.
Leave empty space in at least one section for new utensils or temporary storage. A full drawer becomes disorganized quickly. Reserve 10–15% of drawer space as overflow area.
Address Special Storage Challenges
Oversized Utensils
Large serving spoons, slotted spoons, or pasta forks may not fit standard compartments. Consider diagonal placement across multiple sections. Alternatively, store these items in a separate utensil crock on the counter.
Deep drawers can accommodate oversized items standing upright. Use a tall divider or container to keep them separated. Ensure handles do not catch on drawer slides when opening.
Nested Measuring Spoons and Cups
Keep measuring tools on a ring or clip to prevent separation. Store the entire set in one compartment. If space is tight, hang measuring spoons inside a cabinet door instead.
Some cooks prefer removing measuring tools from utensil drawers entirely. A dedicated baking drawer or cabinet works better for frequent bakers. Assess your drawer capacity before deciding.
Also Read: 21 Ways to Organize Kitchen Small Appliances in Cabinets
Sharp or Pointed Tools
Skewers, meat forks, and basting brushes with metal ferrules can poke through drawer liners. Store these items with points facing the back of the drawer. Use protective sheaths if available.
Do not store sharp knives in utensil drawers. Knife edges dull from contact with other metal tools. Use a knife block, magnetic strip, or in-drawer knife organizer with protective slots.
Maintain Organization Over Time
Return utensils to their designated sections after washing. This habit prevents gradual disorder. Inform household members about the organizational system.
Reassess drawer contents every 3–6 months. Remove utensils you have not used in that period. Donate duplicates or specialty tools that do not match your cooking style.
Clean drawer organizers when they accumulate grease or food residue. Remove dividers and wash with dish soap. Dry completely before replacing to prevent moisture damage.
For more helpful tips, check out our organization section.